Design
Design basics are essential elements in creating a visually appealing and effective website. A color palette sets the tone and mood for the website, while a well-planned layout ensures easy navigation and user flow. The choice of font families plays a significant role in readability and branding. When combined, these design basics can make a lasting impression on website visitors and help convey the desired message and image of the brand. Proper attention to these design elements can elevate the overall look and feel of a website, making it more engaging and memorable.
Getting started
With Smart48 you can design a beautiful website per device with full control in no time. In this guide
we will go through it all step by step to get you where you and your business need to be. We will begin with a short introduction on concept and design, followed by the general steps and all these steps explained in plan English for you to get your website up and running before you know it.
Once that is done you can hit publish and anyone can see and visit your website
Modules
A clear understanding of the concept behind a website is crucial to its successful building and design. Whether it's the purpose, target audience, or desired user experience, having a strong concept lays the foundation for creating a cohesive, user-friendly website that effectively achieves its goals. Without a well-defined concept, a website can lack direction and fail to engage visitors, leading to a poor user experience and potential loss of business.
6.
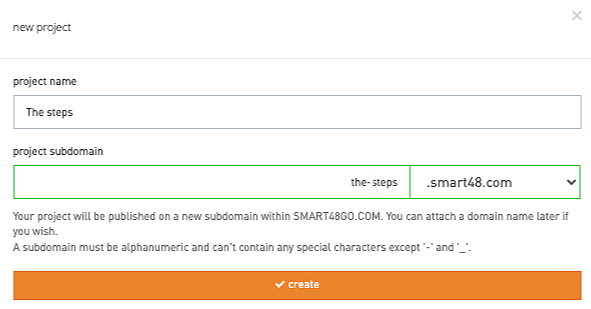
If you just registered you will see the popup below to start a project and pick a name and subdomain. If you are logging in again just go to projects and new project to add your first project
Create content
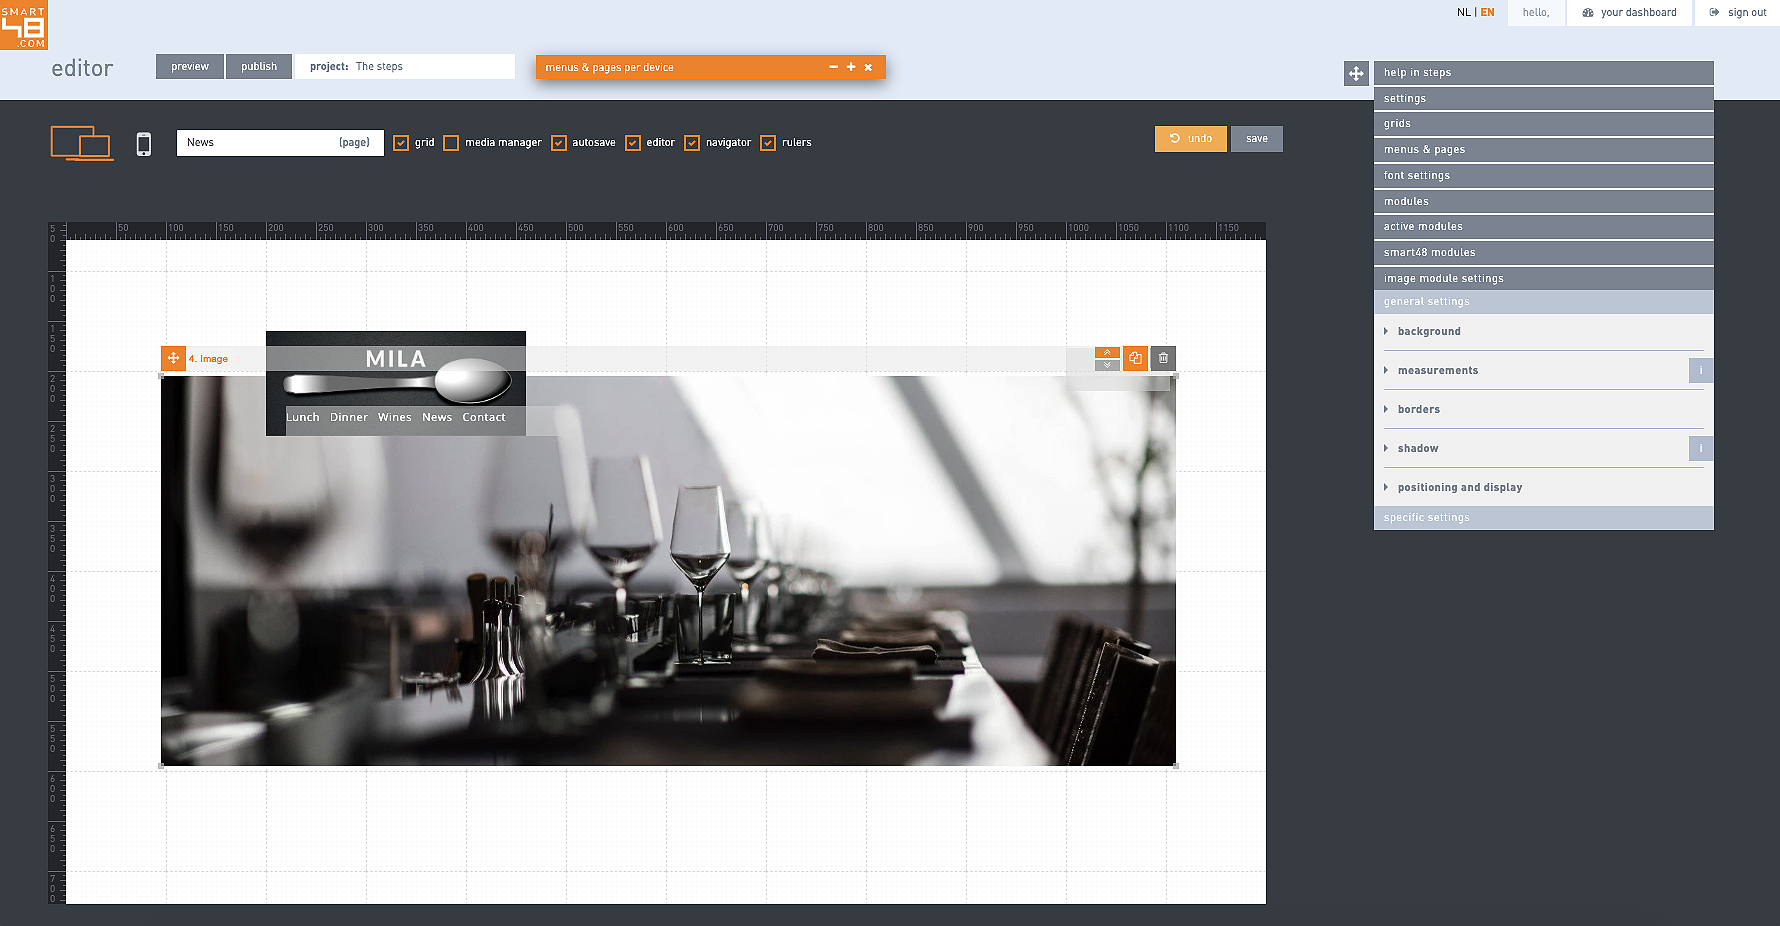
On the editor the first things to is to fo the sidebar, grids and pick a smartgrid. You can clock on the copy icon to copy your choice of smartgrid over to your grids. Do not forget to rename it by using the cog next to copy icon once under your grids or do it on copy.

Pick a project.
1.
2.
4.
5.
Preview
Choose smartgrid
3.
Create pages
Concept
Pick project name
Shortlist


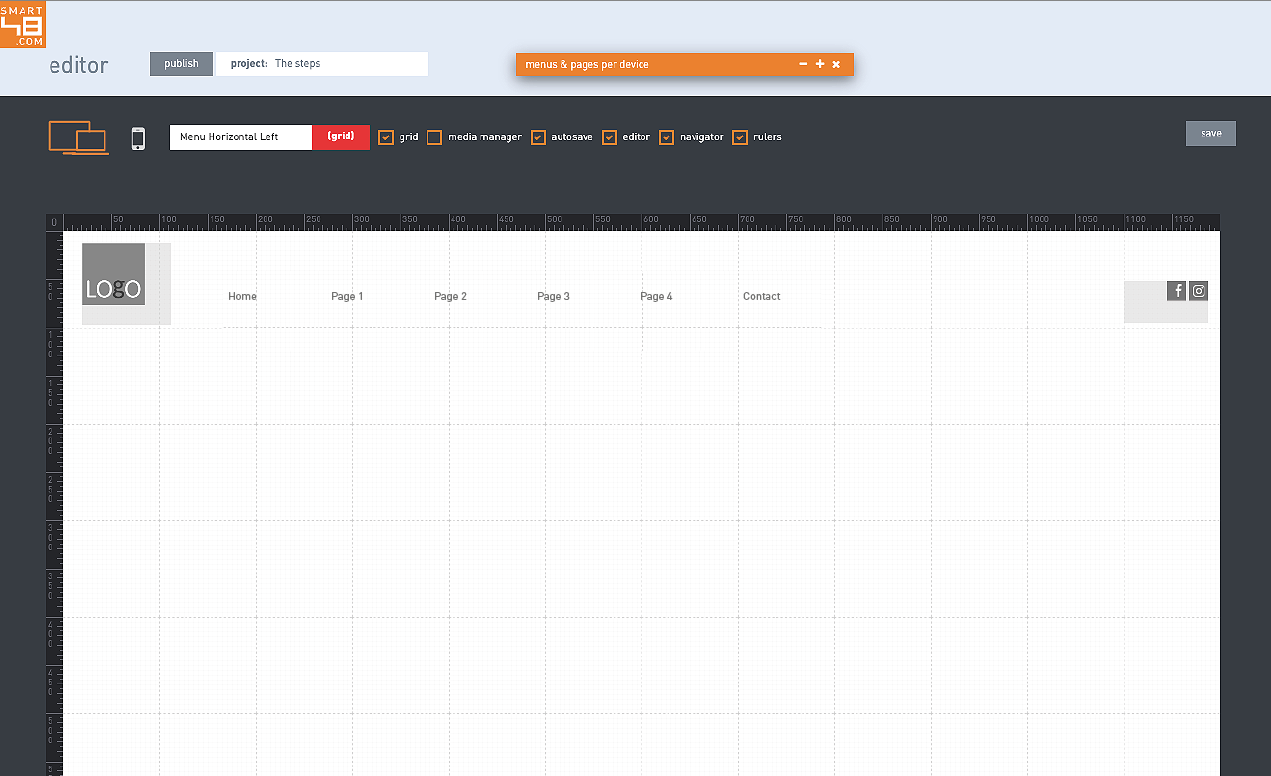
Once you have that done click on pencil to start working on your grid. When you clicked to do so your will see
a red bar next to the grid name in the top right.
If you alread registered you can skip this part of course and just login and move to the next step. For those who have not now it is time to start your 30 trial and begin your very first project. Go to smart48.com/register and fill in the necessary details. Fill in your first name, last name, email address and enter your password twice. Also check the box to accept the Terms and Conditions and Privacy Policy.
Trial.
Choose a smartgrid.
Check the box to allow search engines like Google index your site.
Edit grid
Publish
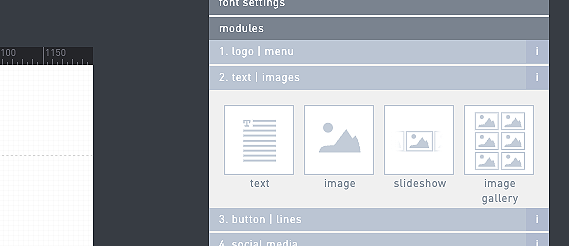
In the sidebar under modules you can find modules. Think of them as the building blocks of your website. Modules are content elements such as text, images, slideshows, forms.... social media.
We should start with font presets as those will be used in all your headers and texts throughout your pages. Smart48 offers beautiful Google fonts for any design or layout. Normally you create 5-10 font presets per project per device. You tend to need the following presets:
site titlemenu page title heading subheading body text body text bold
Under font settings you will see the existing presets and option to add a new font preset. Feel free to edit, add or remove. When you remove a font do understand the module depending on it needs a preset replacement.
NB Do not forget to choose the proper tag for your font to show search engine the function of the font on the page.
Publish
Fonts
Create pages
The idea of the grid is a layout you will use on all or most of your pages. With the smartgrid copied over you get a general layout with header including logo and menu as well as several pages you can rename, adjust or simply throw away. Do remember that every time you copy over a smartgrid all content on your project gets overwritten so that is why it is important to do this only ones and at the beginning.


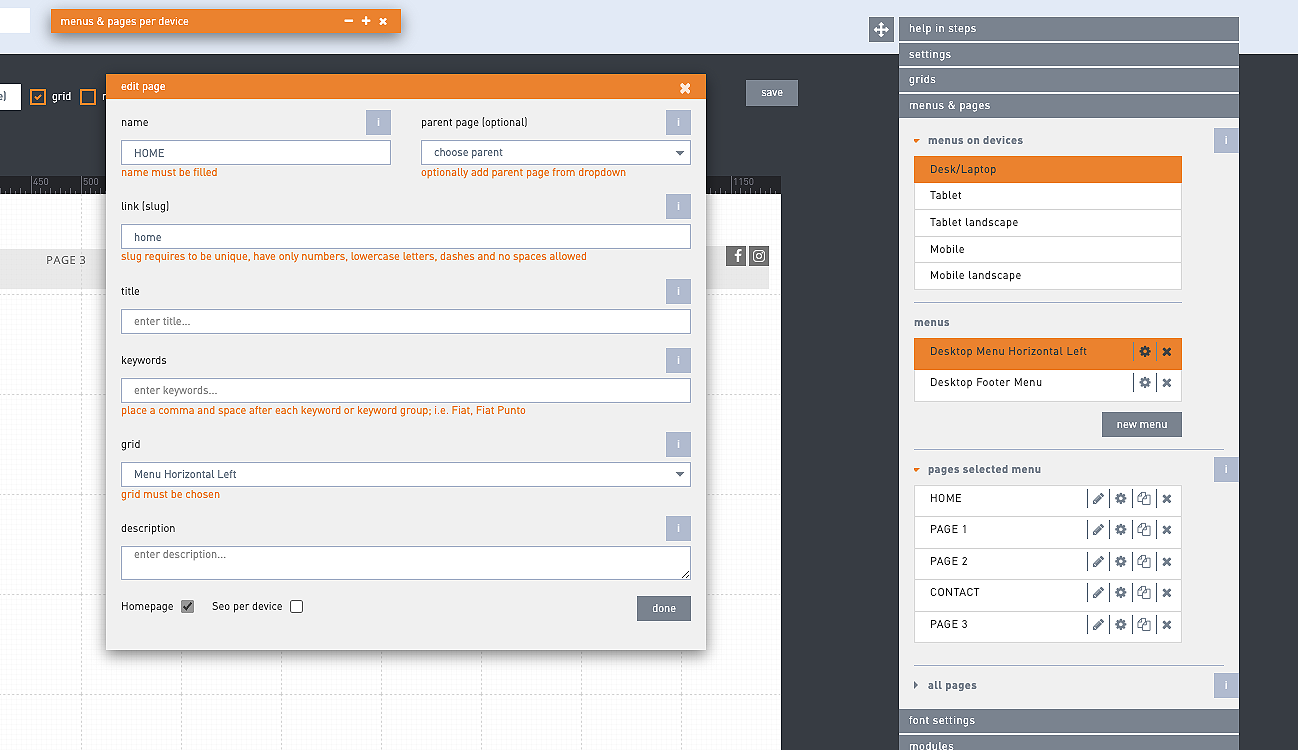
Under menus and pages you can view all pages or pages per device menu item. You will find pages you got with the smargrid copy you added to your grids. The easiest way to get going is to edit existing pages and rename the Pages, page slugs and so on to fit your project. Use the pencil next to the page to edit content but use the cog to edit page details such as name, slug for the url and meta data.
Create content
Preview
Modules can be easily dragged from the sidebar onto the grid. They can also be copied individually or one by one.
Never publish your project right away. Preview, preview preview until all pages are in order for desktop and other devices you worked on. And that normally means at least desktop and mobile with all pages. Preview allows you to preview your project per device and per page.

Once you are really all good to go to show your website project to the world you click on publish. But first make sure your project is indexable or visible to search engines. You can do this in the dashboard under more > administrator & overview. There you can check the box for the project and question in the column SEO Index. Once that is done you can hit publish and anyone can see and visit your website.
Content on your grid as on all pages consists of project and grid settings for the general background and such but mainly it consists of your font presets and modules. Font presets are the font families you use in your project and the modules are the content blocks like text, images.
Do mind the fact that subdomains cannot have spaces, capital letters nor characters like ! ( >. Normal sub-domains are something like my-awesome-company or cool-name or just companyname. Once done click on the button. You will be sent to the editor where you can start designing your website project.

When you add a font you can choose from several types. standard or system font, sans serif, serif, condensed, special, scripts. Then pick a font family. Smart48 offers a great range of Google fonts in different font weights, sizes. Trust us when we say you will find something of your liking!

